A few years back when Cyber-Hobby released its SH-3D kit, I wrote an article for this blog on how to convert it into a more accurate SH-3 (http://tailspintopics.blogspot.com/2013/04/cyber-hobby-sh-3d-build-by-jodie-peeler.html). At the time, even with its flaws and some aggravation in the assembly process, the Cyber-Hobby kit was the best representation I'd found of a Sea King in 1:72. Airfix, however, has changed all this with its new HAR.3 kit.

Having just converted one into an SH-3D, I believe there's a new winner in the Sea King sweepstakes.
The Airfix HAR.3 is tooled as a late version; it is equipped with composite main-rotor blades and has several type-specific bumps, boxes and plates molded in place. The sonar well is plated over, and the interior is equipped as an HAR.3 would be. You'll have to remove or alter certain features; you'll also have to scrounge or scratch build certain others, such as the chin fairing and strobe, and the ADF fairing on the tail. However, you do get several interesting features, such as an ice/spray shield that could be reworked for an SH-3. You also get an option for a folded tail that actually includes a representation of what you see when the tail is folded. This is also the first Sea King kit I can recall that includes a cabin ceiling. That's a welcome feature.
The Cyber-Hobby kit impresses you with lots of CAD-induced detailing and fine engraving. Airfix doesn't give you that kind of eye-popping detail. Where Airfix does excel is in areas much more fundamental: providing a much less troublesome build experience, and a finished model that captures the look of the real thing in a way I haven't seen in 1:72 before.

I didn't take a lot of photos during this build, as my main focus was on build impressions. You will see flaws and errors, and you'll see some mistakes, some of them hilarious. Learn from what I did as you work on your own.
INTERIOR:
Airfix gives you a very nice cabin interior with good engraving and a lot of indentations for mounting troop seats. The underside has several points where slots may be cut out or additional holes may be drilled, depending on which variant you're building. The cockpit is good but basic, with instrument panels represented by simple decals. For most modelers, what you get in the kit will do just fine.
Since I was building an SH-3, I filled most of the seat mounting holes in the main cabin before installing the crew positions and scratch-built consoles on the starboard side. The sling seats are reasonably good, and I mounted a four-seat section opposite the starboard cabin door. As I was building an Apollo recovery helicopter (see http://tailspintopics.blogspot.com/2015/06/sikorsky-sh-3d-buno-152711-old-66.html), I didn't bother with adding the sonar array to the cabin.
In the cockpit, I cut away some of the molded-in bulkhead plating to represent an SH-3 configuration. I didn't do a lot to the cockpit, aside from adding a few strands of cabling to the aft bulkhead. The kit's cockpit seats can be converted to reasonable representations of the early SH-3 seats, so I just added some braces and made some seat belts from painted tape. I used the instrument panel decals for the sake of speed; they work well enough at viewing distance.
On the fuselage interior, I added the prominent stringers and some cabling. You'll need to blank off a few window openings and conceal some other areas, which I did with strategic use of .005" sheet. I also added the "curtain" that many SH-3s had at the rear of the main cabin, too; this was cut from styrene sheet.

This all sounds like involved work, but it was really not a lot of trouble, and most of the time I spent was on adding extra detail that is mostly hidden in the finished model.
FUSELAGE:
Airfix follows the now-standard Sea King fuselage breakdown of two fuselage halves, separate hull bottom, and separate tail section. The cabin ceiling piece does double duty as a section of the port fuselage, which is a clever piece of engineering that actually works well.
Most of your fuselage work will be on removing what shouldn't be there on an SH-3, and filling in some windows. Delete the aft observer windows on both sides, and the forward port-side mid-cabin window. Aft of the exhaust opening on the port side, grind off the bulge Westland introduced, fill and sand everything smooth, and rescribe. Use your references to figure out what other bumps and boxes need to be removed for the specific SH-3 you plan to represent. (See http://tailhooktopics.blogspot.com/2013/02/us-navy-asw-sh-3-sea-king-variations.html for some variations.) Relocate the fueling point access from just aft of the starboard cabin door to beneath the cabin door.
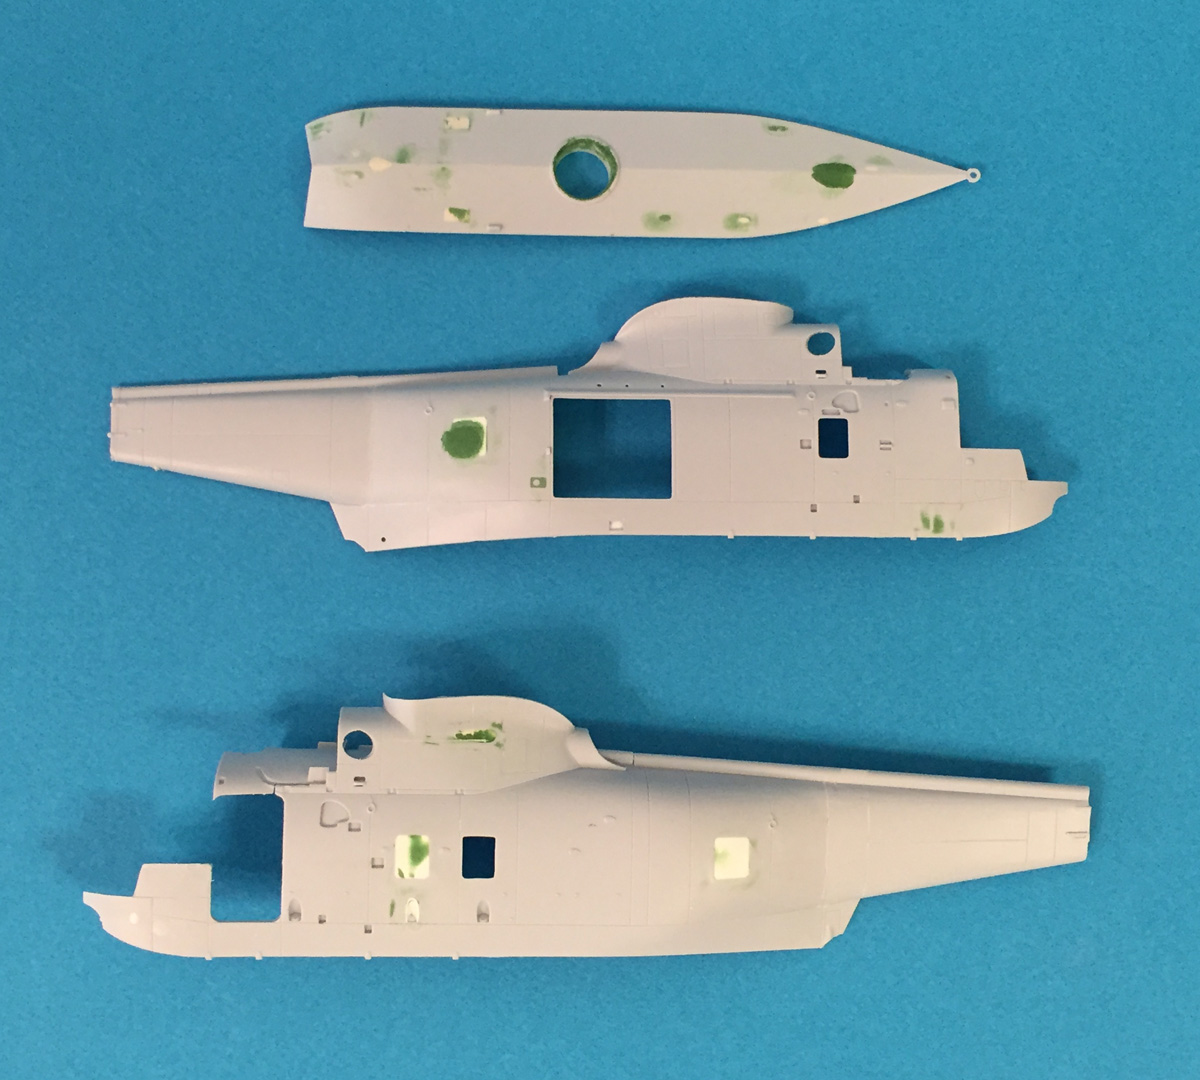
The hull bottom has some molded-in features that must be removed, and most everything that looks like a box needs to go. There will be some patching, but it isn't too difficult. Perhaps the trickiest part will be dealing with the sonar well cover. On mine, I measured out the center of the well cover and carefully drilled it open, leaving just the very edge of the cover as the lip of the sonar well. I installed a short section of Evergreen tube to represent the well interior; since the sonar was removed for Apollo duty, I didn't bother with more than just a blanking plate.


The separate tail poses no issues worth noting, although if you plan to build your Sea King with the tail locked in place, you'll want to do a lot of test-fitting along the way just to be safe.

The sponsons are very nicely done, although the gear wells have no detail worth noting. The landing gear must be installed when you assemble the sponson halves, which is a little bit of a pain to work
around. The port sponson has a raised plate that you'll need to grind off. I also detailed the gear struts a little before I installed them.
ROTORS:
I break this out into its own section because of a couple of issues. The first is that the main rotor blades are the composite variants, which have a very different shape from the metal blades you'd see on an SH-3. It is possible to convert the Airfix blades with some very careful cutting and sanding. However, this has to be done *very* carefully, because the Airfix blades are molded thin and will break easily if you're not careful. I found this out the hard way.

The other issue relates to the folded-rotor option. This is a very nice touch, but from the box the outer blades are molded to sit "flat" alongside the others. They need to sit more "down and out," as you can
see here:
https://img.planespotters.net/photo/387000/original/zh540-royal-air-force-westland-sea-king-har3a_PlanespottersNet_387145.jpg
http://www.britmodeller.com/walkarounds/helos/seaking_sh3/Seaking_000_01.JPG
I cut the blades from their attachment points, drilled holes and made mounting points with wire, and reattached the blades in their proper positions during final assembly.
ASSEMBLY NOTES:
Once the modifications are done, the Sea King kit is typical modern Airfix: easy assembly, clever engineering, and just a lot of fun to build. I didn't encounter much trouble, and what little trouble I
encountered was mostly of my own making.
There will be some minor scratch building along the way, mainly the chin fairing with strobe and the ADF fairing on the tail. I used drawings and photos in "Famous Aircraft of the World No. 15" to help me build those from laminated styrene sheet.
Use caution when mounting the sponsons to the fuselage. It can be tricky to get everything aligned, and the assembly can be delicate once it's done. Since you have to install the landing gear before you assemble the sponson halves, any alignment errors will get magnified.
The clear cockpit cab looks like a nightmare to assemble, but in reality it goes together very well if you are patient and do a little dry-fitting. Clean up the seams very carefully. You will be rewarded
with a Sea King that has the best "face" of any I've yet seen. Unlike the Cyber-Hobby kit, there's no overly-close tolerances or hidden trouble. Just make sure everything's properly aligned before the glue sets.

Like the Cyber-Hobby kit, you have the option of open doors on both sides. Airfix's port door is marred by ejector pin markings inside the steps, and they're hard to clean up, so I cut little strips of Evergreen stock to hide them. The steps will also benefit from some detailing, and I added some reinforcement plates and drilled some holes to more closely match references.

In the kit, the hoist winch mounts to its struts a little higher than it would on an SH-3. I just trimmed the winch bracket down, mounted the winch body in the correct spot, and filled over the mounting gap. Easy enough.
You don't get any exterior mounting points or weapons shackles in the Airfix kit, so you'll have to scratch build any of that stuff you want. For this model, I just went with basic representations from the scrap plastic bin, and scratch built the recovery cameras and other equipment as needed.
From there, I finished the model as I would any other Sea King of the period. Decals are from the Old 66 Decals set (http://www.starfighter-decals.com/old-66-deca66.html) for the Apollo 13 recovery, and I chose that markings option because everybody out there in Internet land loves that darn alleygator. (Click HERE for a review of the most recent edition.)

You don't get much in the way of recessed vents or grilles needed for an SH-3, so I created some in Illustrator and printed them on a laser printer. They help add some of the necessary "busy" to the airframe. Fuselage antennas were added from brass posts and invisible thread. I also spruced up the folded tail with some brass wire and Evergreen bits; not perfect, but it keeps the eye happy.

Some comparison photos of the forward fuselage of the Airfix and Cyber-Hobby Sea Kings. The Airfix kit is "Old 66" with no shield in front of the engine inlets:


CONCLUSIONS:
Airfix's new Sea King kits may lack the impressive detail of the Cyber-Hobby kits, but they do succeed in areas much more fundamental: a better build experience, and in getting the fundamentals correct. My own feeling is that Airfix took the time to really understand the Sea King airframe, and this helped the kit designers capture how the real thing looks. It is a simpler kit than the Cyber-Hobby offering, but the Airfix kit gets it right in ways Cyber-Hobby didn't - and does so for half the price, too.
From the way the Airfix kit is engineered, it would take some serious tool changes or additions to get an accurate SH-3 release. Whether Airfix has a surprise up its sleeve, I don't know. It wouldn't be
difficult, though, for an aftermarket firm or a CAD/3D-print designer to tool up a nice conversion set for the Airfix kit and provide the missing pieces. This kit would justify the effort.
If you're wanting to build a 1:72 Sea King, get this kit. It blows the doors off all the other options.


